Henderson Plastics Ltd
Lyng Hall Road
Wood Norton
Dereham
Norfolk
NR20 5BJ
Tel: 01362 683 364
E-mail
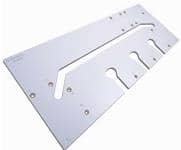
A well made range of professional quality
Worktop Templates
for use with either ¼" or ½" routers
Order Total:
Order Total:
Perfect postform joints
Fitting a modern kitchen is
well within the reach of any competent woodworker. But if there's one thing that is bound to cause problems, it's fitting the worktops, particularly making the joint between adjacent boards. The bulk of laminated worktops fitted in this country are likely to have post-formed edges (where the laminate is rolled over a quarter- round routed on the leading edges of the chipboard core material), and these are difficult to joint accurately without the use of a manufactured jig.
Up till now, these jigs have been expensive to buy, being designed primarily for the professional kitchen-fitter who requires a robust that will last many uses. Though these can sometimes be hired from local shops, it is now possible to buy cheaper versions designed more for the one-off user, enabling the DIYer to rout his own perfect joints for a fraction of the cost.
These jigs enable worktop
lengths to be butt jointed at 90º to each other, the join itself being in effect a mason's mitre, where the leading edge of one board is cut back at it's end by 1in to receive the end of the second board, the post-formed edge on both being mitred to fit each other. It's worth noting that if you don't want to bother with this faff, worktops can be bought from specialist suppliers with square edges, allowing you to lip the leading edges with a decorative timber, mitred at the corners.
The layout of your kitchen can affect the way in which worktops are fitted,especially when these wrap themselves around three walls in a continuous -U shaped run. These complex arrangements will involve careful measuring and cutting of the boards before jointing the ends. However,the average kitchen tends to have little more than an L-shaped layout, and the following instruction is based on this. Note that these jigs only joint the worktops at 90º. If your walls are running out of square you will need to allow for this when scribing the back edges. (you may need to order wider worktops if this is severe).
well within the reach of any competent woodworker. But
Up till now, these jigs have been expensive to buy, being designed primarily for the professional kitchen-fitter who requires a robust that will last many uses. Though these can sometimes be hired from local shops, it is now possible to buy cheaper versions designed more for the one-off user, enabling the DIYer to rout his own perfect joints for a fraction of the cost.
These jigs enable worktop
YOU'LL
NEED
A ½" router
with a ½" by
50mm TCT
cutter and a
30mm guide
bush, for use
with a kitchen
worktop jig
The layout of your kitchen can affect the way in which worktops are fitted,especially when these wrap themselves around three walls in a continuous -U shaped run. These complex arrangements will involve careful measuring and cutting of the boards before jointing the ends. However,the average kitchen tends to have little more than an L-shaped layout, and the following instruction is based on this. Note that these jigs

Template Jigs
Most worktop jigs are designed for the professional market, for use with a 30mm guide bush and a ½in dia. straight bit with a 50mm cutting length. With the heavy cuts involved, a ½in collet router is generally necessary,with a matching shank on the cutter. A ¼in shank bit and router might suffice for a 'one off' but you have a minimum of 30mm to cut through (plus the thickness of the template), so the vibration at full plunge through the bit will increase and could have a detrimental effect on the joint.
Jigs come drilled with a series of holes to position them for the correct set-back from the post-formed edge and also for the width of worktop in use.
Routing a Worktop
Start by cutting the first piece of. ...worktop to length, which should be the part of the joint which has the post-formed edge routed. Depending on your jig either drop in the location pegs or screw them into the correct orientation for this process. Two pegs locate against against the front edge, while a third end stop has an adjustable position to allow for different widths of board.
Correct orientation of the worktop is important. One part will be routed face up, the mating part face down, to prevent tear out of the laminate as the cutter engages the worktop. To avoid confusion, and a costly mistake, look at the piece you are cutting and make sure the cutters leading edge will rotate into the face of the laminate. If it is cutting away from it then it
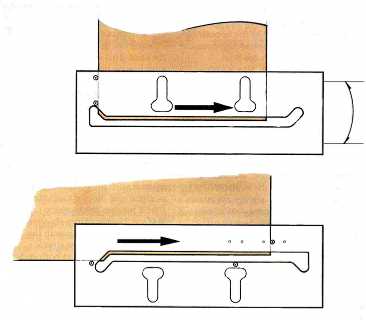
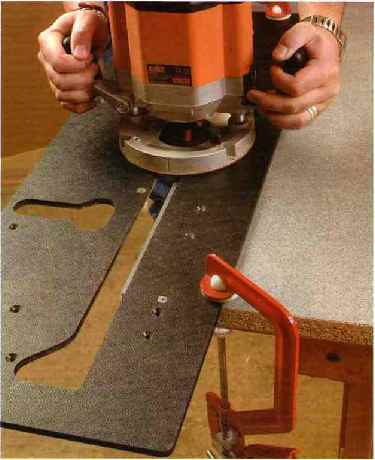
Drop the router into the slot on .the jig and check that it runs through without fouling the clamps before making the cut. This should be made in a progression of plunges; a 40mm top requires four or five passes. Once the waste has been removed, take a final pass to ensure there are no ripples left on the cut edge. Ensure at all times that the router is seated perfectly on the supported side of the jig and is not tilting.
The mating part is routed in similar fashion, relocating the pegs to position it correctly on the worktop. This time two of these simply ensure the jig is square to the run, the cutting slot being eyed into place over the end of the board
- Henderson Plastic Ltd produce a well priced range of worktop jigs in polypropylene to suit any guide bush /cutter match and fit various worktop widths. These are more than adequate for home use, and should last a life time of house moves with care.
- For prices go to Jigs & prices
Lyng Hall road
Wood Norton
Dereham
Norfolk
NR20 5BJ
01362 683364
Template Jigs
Most worktop jigs are designed for the professional market, for use with a 30mm guide bush and a ½in dia. straight bit with a 50mm cutting length. With the heavy cuts involved, a ½in collet router is generally necessary,with a matching shank on the cutter. A ¼in shank bit and router might suffice for a 'one off' but you have a minimum of 30mm to cut through (plus the thickness of the template), so the vibration at full plunge through the bit will increase and could have a detrimental effect on the joint.
Jigs come drilled with a series of holes to position them for the correct set-back from the post-formed edge and also for the width of worktop in use.
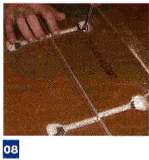
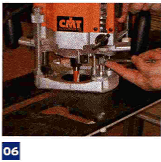
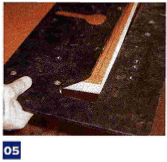
Use the jig with the pins to position the part of the cut where the post-formed roll starts, but pull the jig around until it lines up with the pencil mark mad previously. Drop the router into the slot with the guide bush in position and plunge the cutter so that it touches the worktop surface. Lightly clamp the jig so that it can be lined up with the cutter just grazing the struck pencil line,checking at both ends of the jig to make sure it will follow the line perfectly. As with good jointing technique, the line should be left in so that you can
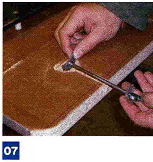
The two jointed parts now require the recesses for the 'dog bone' bolts that pull the parts together to be routed in the underside, again using the appropriate locating pins for the correct reference positions. Use the flange of the bolt as a depth gauge and set the router plunge depth to this, plus a couple of millimetres to ensure the bolts sit below the surface. with the guide bush still fitted, rout the slots out on both halves of the joint.
If you have a free end that allows the worktop to be pushed into position, a couple of biscuits in the joints can be used as a locator to keep the surfaces flush as the bolts are tightened.
Worktops trapped between walls are more difficult to biscuit as the mating parts of the jig needs to be dropped in at an angle. You can try angling both tops to do this but it is tricky, especially if you are working with very long work surfaces.
When fitting the worktops into their final resting places, it pays to run a small bead of either a colour coded or clear sealant close to the top of cut edges to ensure a waterproof joint.
If the worktop must fit between its mate and another wall, you can cut the joint then measure the required length, cutting off accordingly. This is fine if the walls are good, but there are occasions where the walls will be out of square, so a better approach is to use the mating cut as a scribing point.
To do this, the worktop needs to be fitted to the far end and back walls first and left about 50mm oversize at the joint. Depending on which way the first part of the joint was cut (face side up or face side down), the worktop will need to
..of the shapes first. Ensure these fit the corners and lumps and bumps of uneven walls before committing to the real stuff. Tiles may cover a small gap but should not be relied upon to cover large scale mistakes. And remember the old adage, measure twice, cut once!

